Configuration Review
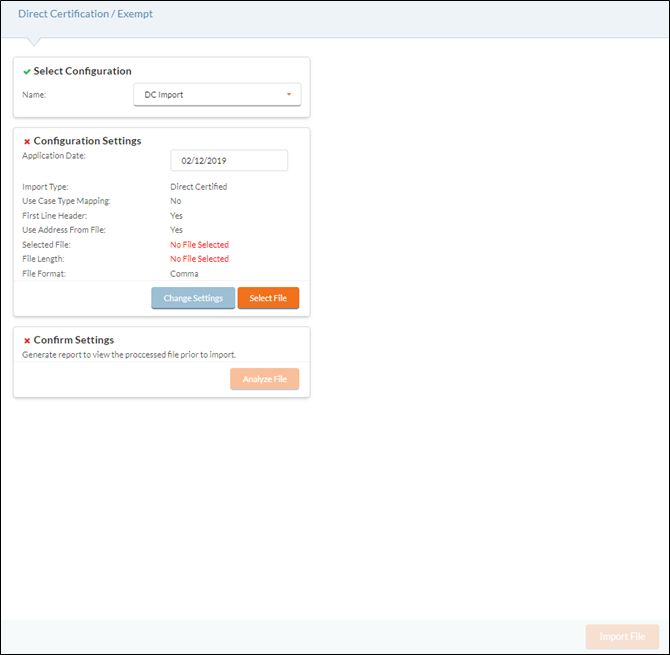
This form includes three steps to ensure the Direct Certification/Exempt file is correct and properly formatted for import into Meals Plus Web.
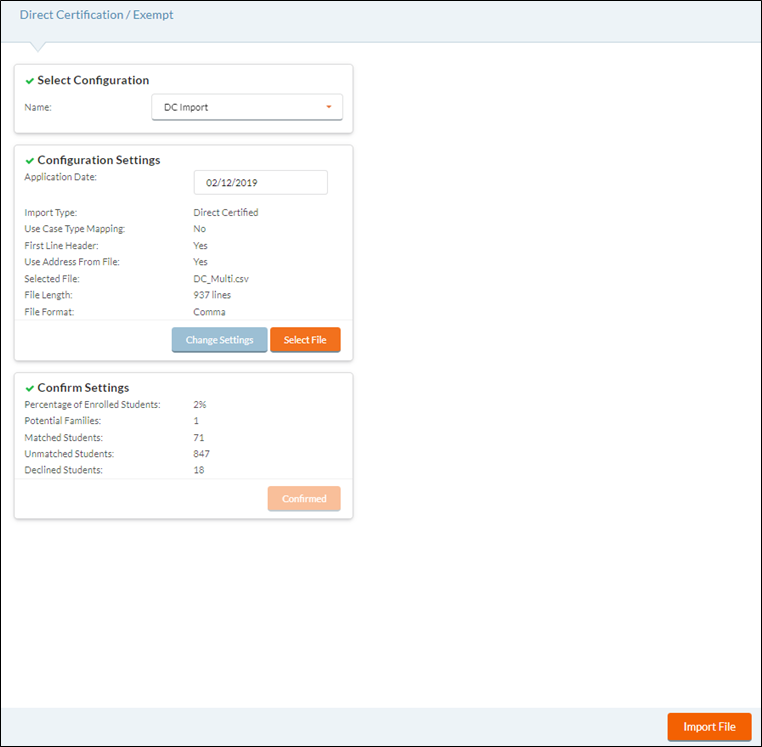
Once a step has been completed successfully, a green checkmark will appear by the heading.

Select Configuration
The first step is to confirm the Configuration File.
-
Select a previously saved Configuration File or Create New from the Name dropdown list.
-
If Create Name is selected, the Direct Certification/Exempt main form opens.
-
Configuration Settings
The second step is to confirm the Configuration Settings and select the DC file.
-
Select the date to use as the application date from the Application Date dropdown list.
-
If nothing on the application changes, the application date will not update.
-
When importing a DC file, if an existing case type is SNAP or SNAP Equiv. and case type does not change, the applications will not update.
-
If an existing case type is not SNAP or SNAP Equiv., and the new case type is SNAP or SNAP Equiv., the case type and application date will update.
-
-
Import File, Use Case Type Mapping, Use Address From File, and File Format settings are all from the Direct Certification/Exempt main form. To make changes to any of these, click the
 button.
-
The Direct Certification/Exempt main form opens to make these changes.
-
-
Click the
 button to select a DC file to correspond with these configuration settings.
Confirm Settings
The final step is for Meals Plus Web to analyze the file for accuracy and ability to import.
-
Click the
 button to analyze the uploaded file and ensure its accuracy.
 -
A Summary of Data is then provided.
-
Students are only imported if they are 100% matched on either SSN or Student#.
-
If the Student # exists more than once in the file, only the last entry will be stored.
-
Meals Plus automatically does the Family Matching for the user based on ONE of the following ways with the student data that matches in the Import file.
-
Case Number Match
-
ParentFirst, ParentLast, Address 1, Address 2 and Zip match, or
-
ParentFirst, ParentLast, Address 1, Address 2 and City match, or
-
ParentFirst, ParentLast, Address 1, and Zip match, or
-
ParentFirst, ParentLast, Address 1, and City match
-
-
NOTE: Homeless, Migrant, Runaway and Headstart students will match households the same way that Direct Certification import does.
-
A student selected for verification cannot be grouped or have their application modified.
-
Only students with a current status of 2, 3 or 4 will be grouped/family matched on an application.
-
If a student in the grouping/family matching is on a current application, their name is first and any additional students in the grouping will be added to their existing application.
-
-
After a few seconds, the
 button turns into the
  button.
 - Click the
 button if the information under Confirm Settings is correct.
 - The Configuration Settings and file are now verified.

-
Click the
 button when you are ready to run the process. If any students can be grouped on an application, they will be automatically matched based on the Confirmed Settings information.
-
When extending Direct Certified, Case # and Case Type, ‘Extended Benefit’ will be set as ‘Yes’.
-
If an application has multiple students, and more than one of those students is in the Direct Certified file, the ‘Extended Benefit’ will not be set as ‘Yes’ if the student has their own Case #.
-
If the student being imported as Direct Certified is currently marked ‘Extended Benefit’, ‘Extended Benefit’ will be set as ‘No’, and apply their own Case #, unless it is an adverse change.
-
-
A ‘Success: Import queued’ message appears at the top of the form when the import is complete.
-
Click the notifications button or go to Import Results to view details of the import.


